Faceting a Marble With a LapDancer Faceting Arm
What is a LapDancer Faceting Arm
The LapDancer faceting arm is an external faceting arm that can be used with any standard flat lap grinder from 8 to 24 inches.
Extremely versatile, it can handle small marbles and beads up to larger paperweights for faceting. If you already have a flat lap grinder, this is the perfect way to get into faceting work quickly and easily, and if you don't already have a flat lap, the combination of a small grinder and the LapDancer opens up new possibilities for your work without breaking the bank.
Prepping Your Piece
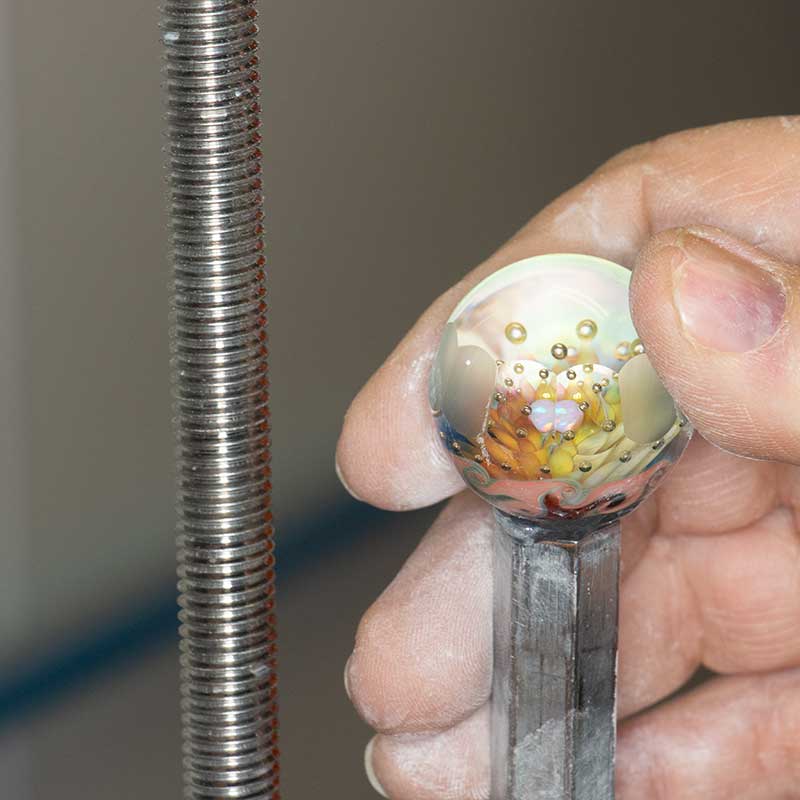
The dop is the part of the faceting arm that you attach your working piece to.
It's a removable piece that you mount your glass or stone to and then re-attach to the faceting arm. With the LapDancer, it is a standard 3/8-inch coupling nut available from most hardware stores, so it's simple to obtain and use. Simply use a two-part hardware store epoxy to mount your piece to the dop.
Using a transfer jig can make it easy to initially mount your piece to the dop along with creating a perfect plumb mount to the opposite side to facet both sides of a piece.

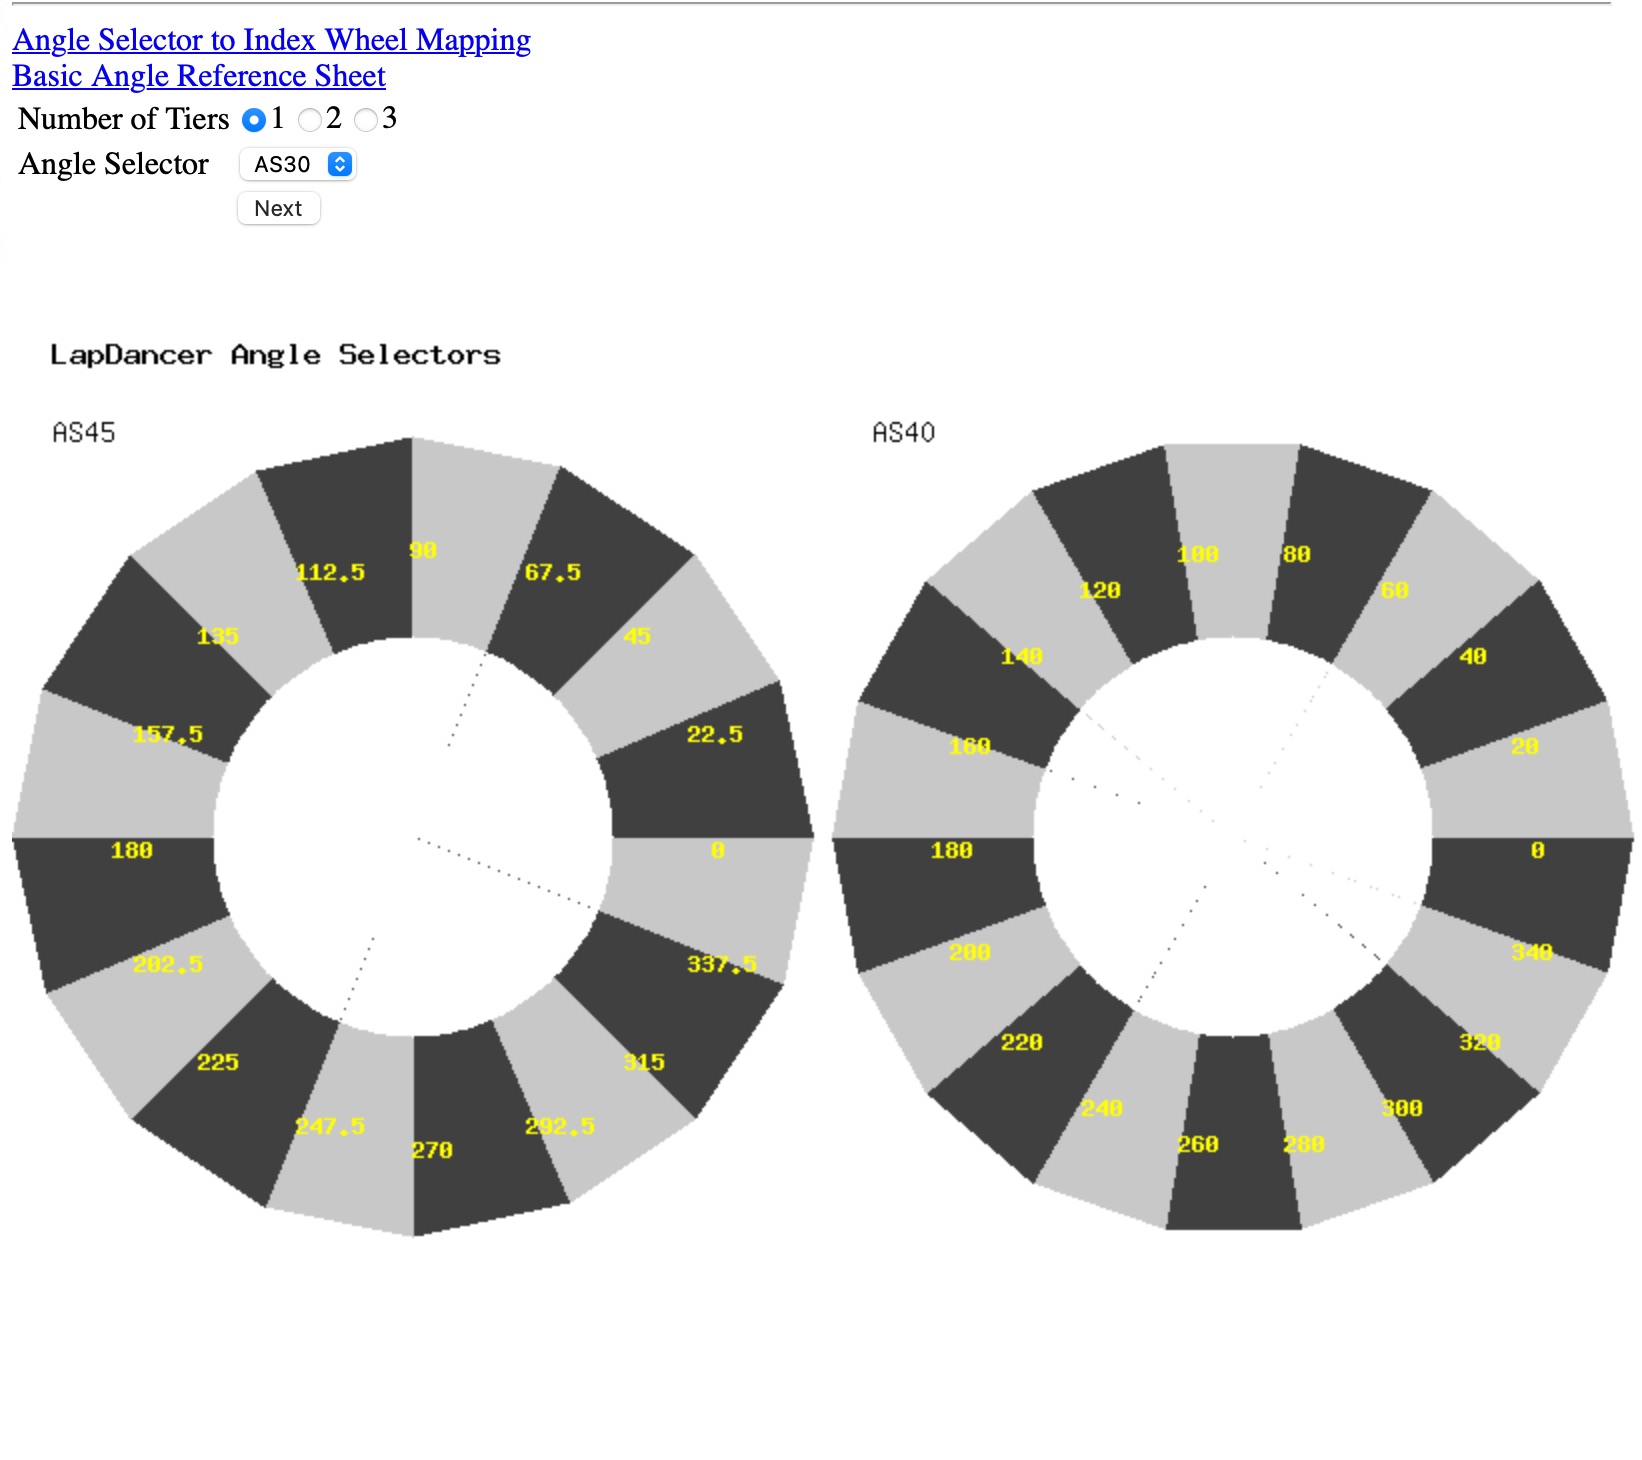
Get Your Angles
If you've never faceted before, it will be good to have a cheat sheet for your angle selections on your piece until you are comfortable with faceting details.
You can go to Prismware's Facet Calculator to quickly set up a faceting routine with angles to get you started on your faceting journey.
Start Your First Grind
When starting your first angle, it's very important not to overdo it. Keep count of the number of passes for each facet so they will all be the same size.
Precision and patience are the keys when facing work. Take your time and double-check before moving on. Once you change an angle, there is no going back.
Start with a finer-grit electroplated diamond disk like a 325-grit or 500-grit for your first angles.


Pre-polish Your Facets
With small surface areas like facets, you can quickly move from a very fine grit first grind to a fine grit resin diamond for your pre-polish.
While the facet sizes will increase some, the finer grit smoothing pad will keep excess growth of the facet to a minimum before the polish step. For most routines, you can move from the electroplated disks to a 600-grit or 1200-grit resin diamond pad.
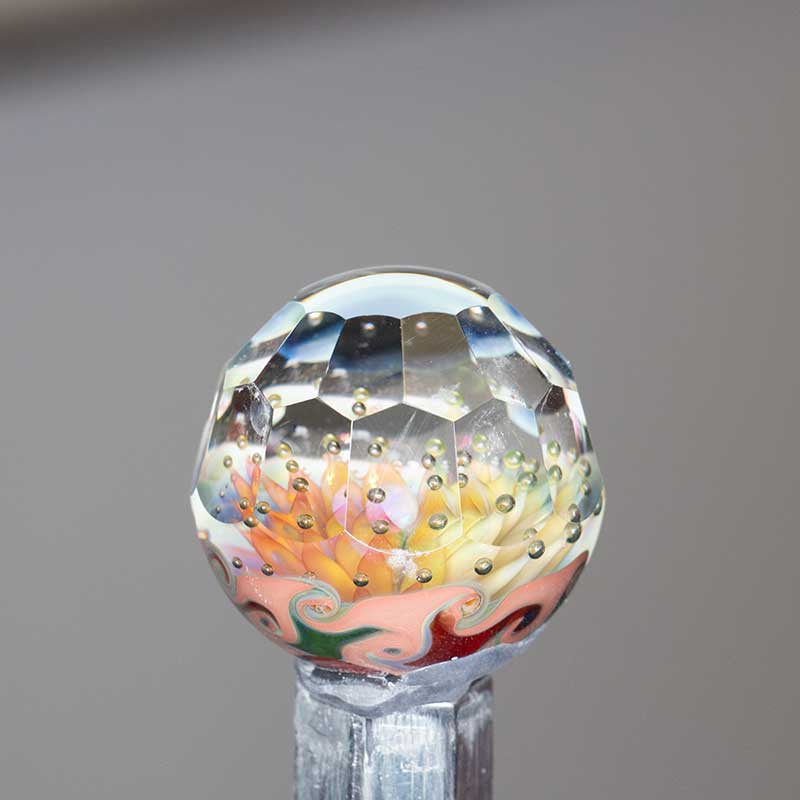
Final Polish on Your First Face Angle
The polish stage is where the real magic happens. Here you don't have to keep count of every swipe on each facet as the polish stage will not increase the size of the facet itself but will expose the beauty of your faceting work.
Once each facet is polished, you're ready to move to your next face angle. We recommend the LP66 pad with cerium oxide for the final polish. We offer the LP66 pads in a thinner .050" to match the height of the previous disk in 8-inch, 10-inch, and 12-inch diameters.
Second Time Around
Now that you've finished your facets on your first face angle, reset the LapDancer faceting arm for your second face angle and repeat the grinding, pre-polish and polish steps again on this new line of angles.
Finish Your Piece
Now that you've finished your first two tiers of face angles, re-set your LapDancer faceting arm to the third face angle and grind, pre-polish, and polish your final routine of angles for your finished piece.
Enjoy your success!
Login and Registration Form